
Release Wave update: Power Platform
We are in the process of the changes from Microsoft Release Wave 1, 2022 on Power Platform becoming available to everyone. Many of the releases became available in April but there are more to come during May, June through-out September.
Our colleague Vivian Voss, Business Consultant & Microsoft MVP will keep you updated in a monthly blog post of the changes that are either available now or will be available during the month. Welcome to Microsoft Release Wave update: Power Platform.
In this months Microsoft Release Wave 1 update on Power Platform the topics are:
Power Apps:
- Explore data through modern Advanced find
- Appointment description supports rich text
- Create and join Teams meetings from in-app Appointments
- Enable quarantine for non-compliant Power Apps
Power Automate:
- Undo feature in cloud flow designer
- Improved home page experiences
- Re-submit multiple failed runs at once
Important: If an update has been made generally available but you are not able to see it yet in your setup, be aware of the following:
- Is it a feature, that admin has to enable? Then reach out to your System Administrator, ask to have the feature enabled to you and then try to access the feature again.
- Is everything enabled but you are still not able to access the feature? Contact your Microsoft partner or open a service ticket to Microsoft.
Power Apps
On April 1st, 2022, the new modern Advanced Find went live to everyone. This means that you no longer can find the Advanced find icon in the top bar of your model driven apps.
With the new modern Advanced find, you can access any table through Search and use Advanced filters to find the data needed for you – fig. 1.
Explore data through modern Advanced find.
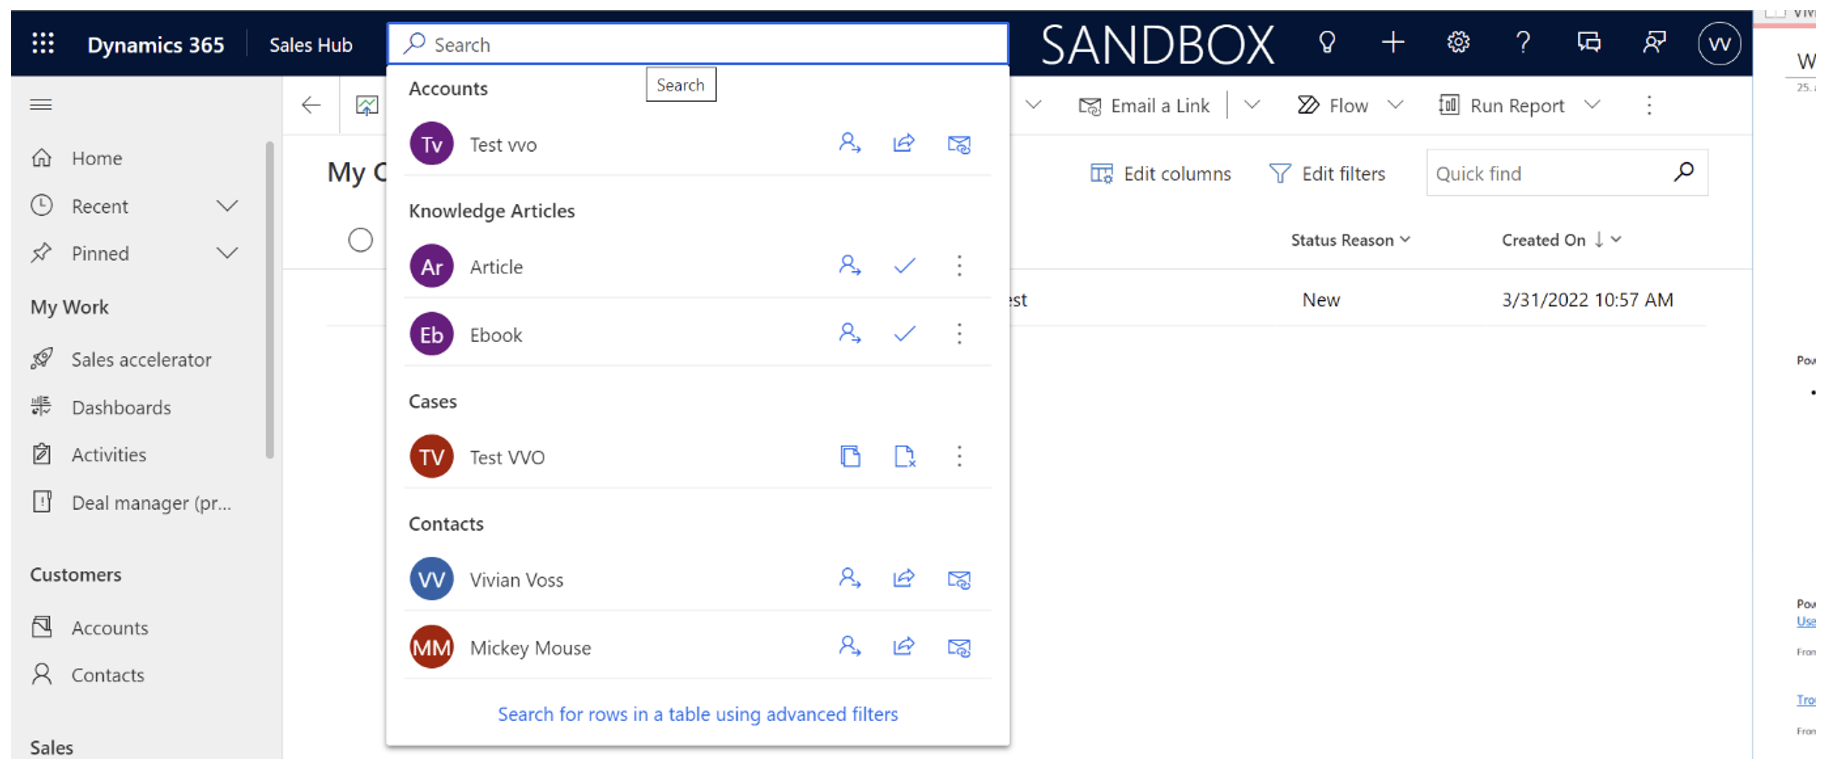
Fig 1: Explore data through modern Advanced find
Besides searching for different data, you also have the possibility to search for specific views – fig 2 – by name and quickly share them with your team, if needed. In the same window, you can also choose, which views you would like to see, and which you would like to hide. All changes will be user based.
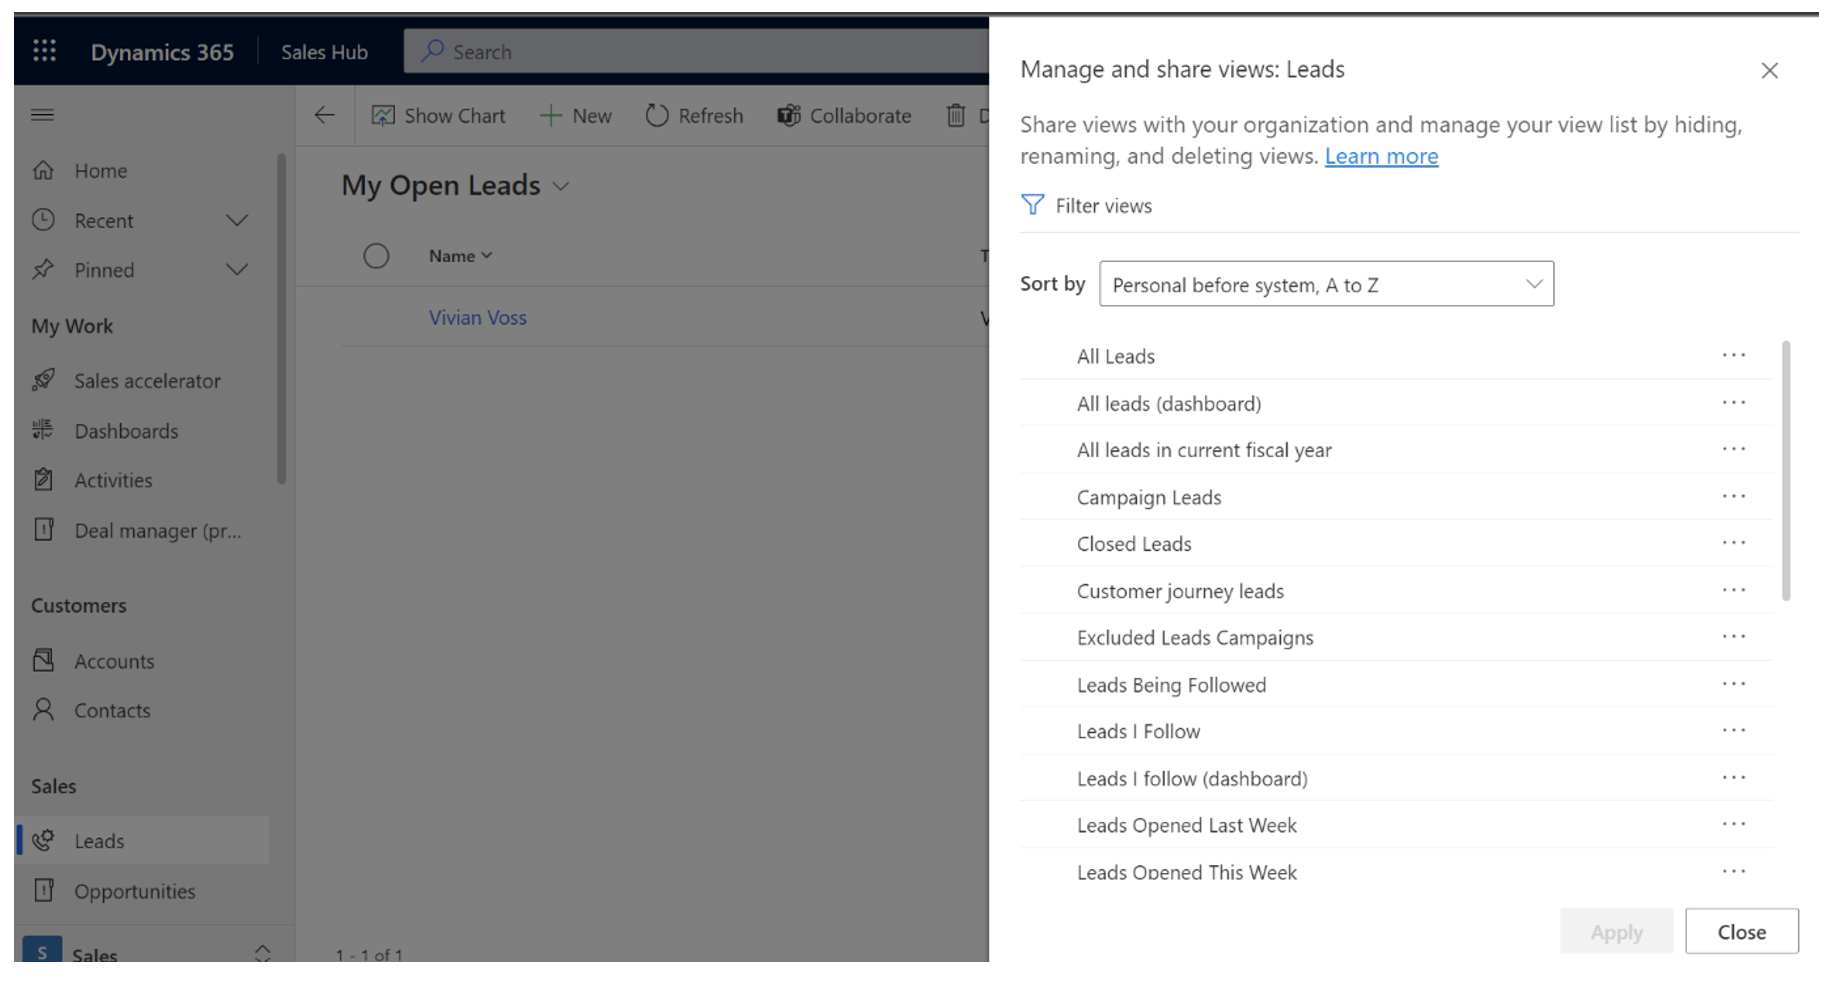
Fig 2: Search for specific views
When creating a meeting in your Model Driven app, it is now possible to add lists, links and other modifications to your text in the Description part of the Appointment – fig 3. This makes it easier to add links to supportive materials, websites or in general make the text look much nicer, than before. This feature can be enabled together with the Teams meeting feature and will become the default editor for emails and appointments in the future.
Read more: Appointment description supports rich text
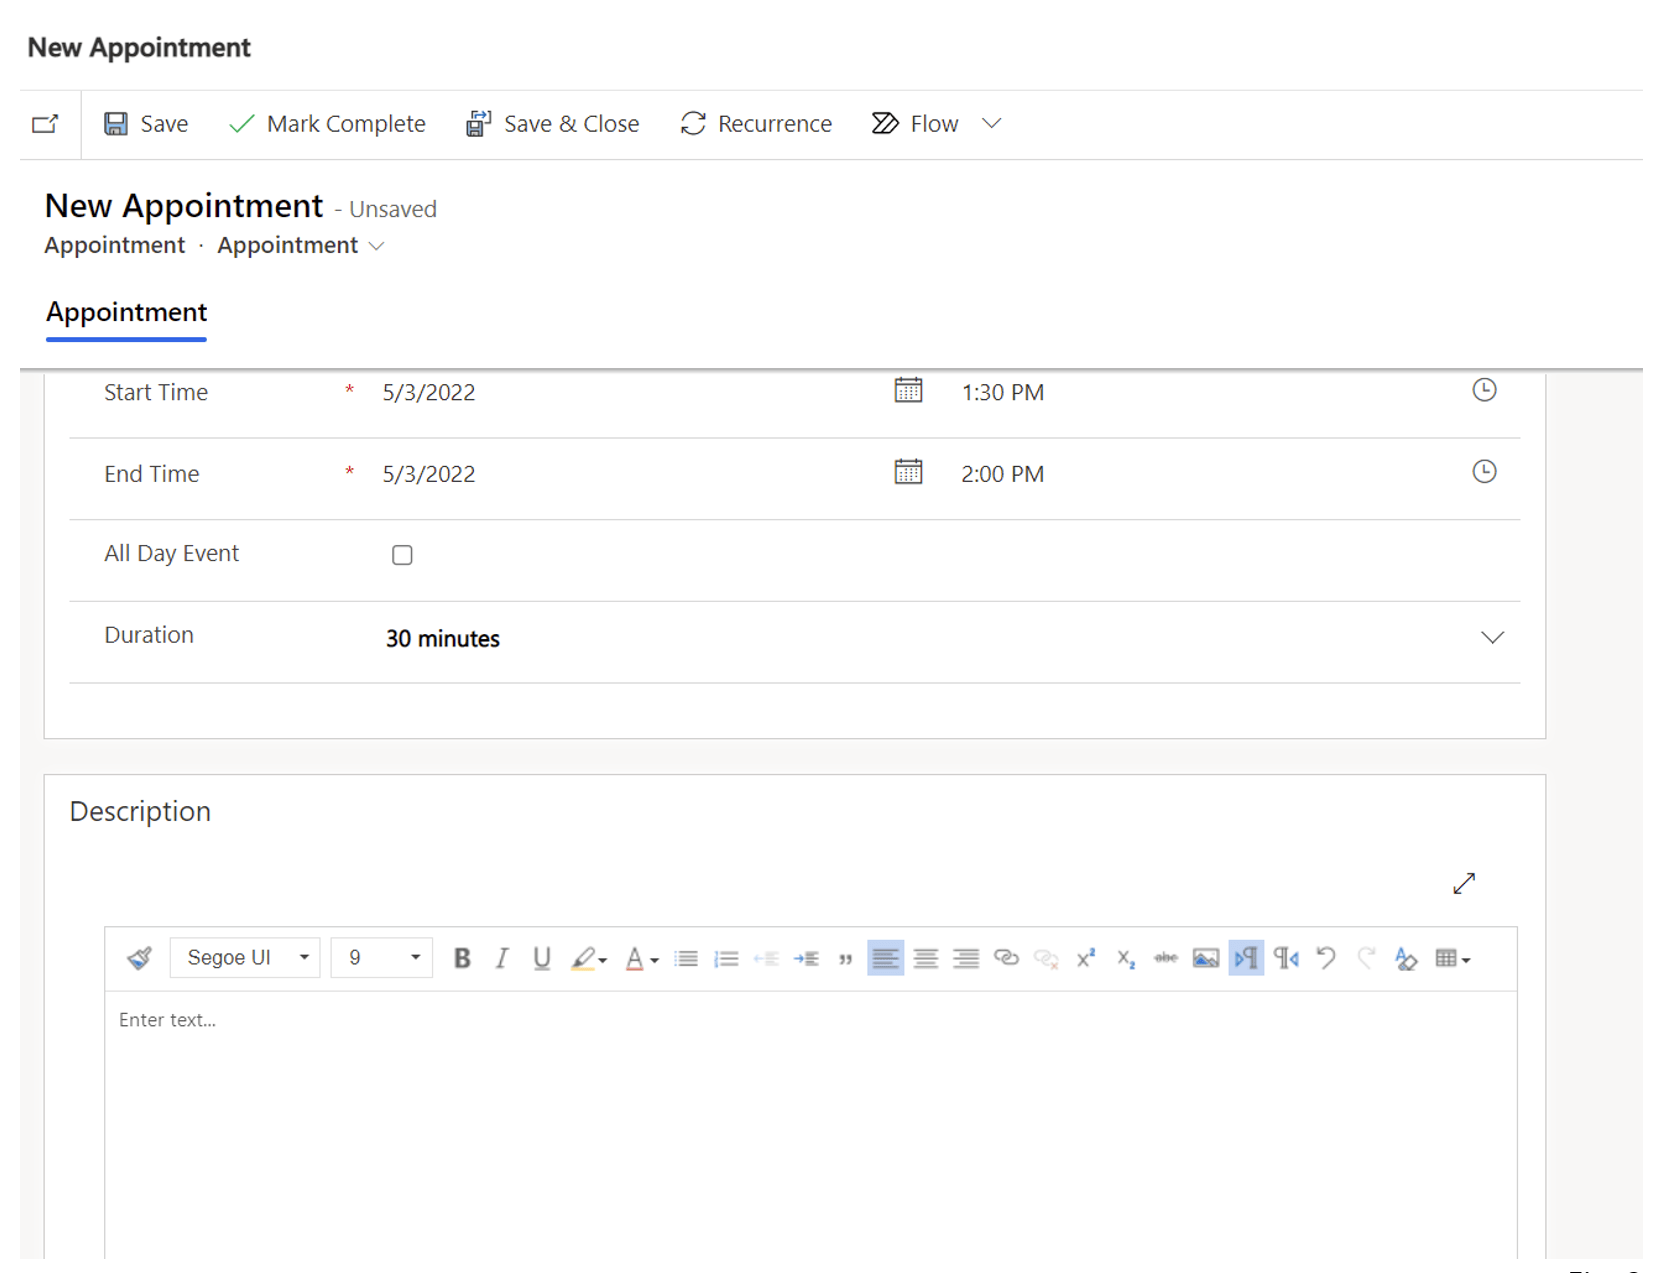
Fig 3: Appointment description supports rich text
When creating appointments – fig. 4 – from your model driven app, you can now quickly indicate, if it is a Teams meeting. Just click on the slider and a Teams meeting link will automatically be added to the Appointment (fig. 5), you are creating. (The Teams link will appear after you have saved your Appointment).
Read more: Create and join Teams meetings from in-app Appointments

Fig 4: Create and join Teams meetings from in-app Appointments

Fig. 5
Security and keeping everything up to date is very important to Microsoft, therefore, next to the data loss prevention policies, Microsoft has also enabled admins the possibility to quarantine an app – fig. 6. (At the moment, it is only quarantine Canvas apps that are generally available).
The quarantine functionality makes it possible to admins to limit the usage of apps that might not be working, doesn´t meet the organizations security requirements or just might need some changes.
To admins and also makers of the apps, the Canvas apps that are marked as quarantined, will still be visible and editable in the Power Platform Admin Center and on the Maker Portal, but end users will receive a notification indicating that the app is currently not available.
Read more: Enable quarantine for non-compliant Power Apps
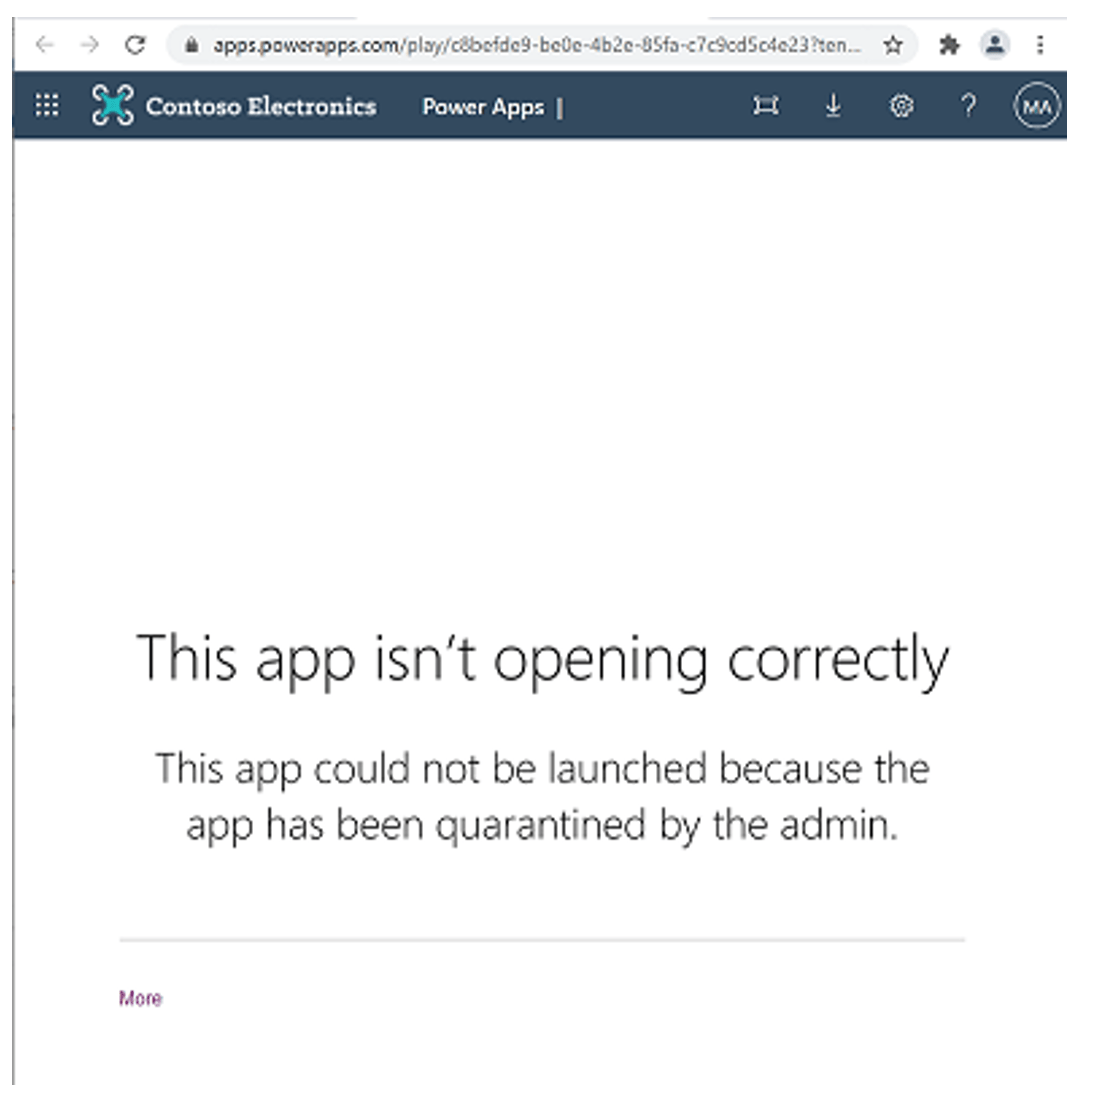
Fig 6: Enable quarantine for non-compliant Power Apps
Power Automate
Up until now, it has not been possible to undo the small mistakes you might have made, when creating a cloud flow. It has now changed! Microsoft has now added Undo and Redo buttons – fig. 7 – to cloud flows. This makes it possible to you to recover some of the steps you might have deleted by accident. A feature that has been requested by many.
At the moment it is using local browser storage for design time only. So, it is not possible to use the feature when browsing in-private mode!
Read more: Undo feature in cloud flow designer
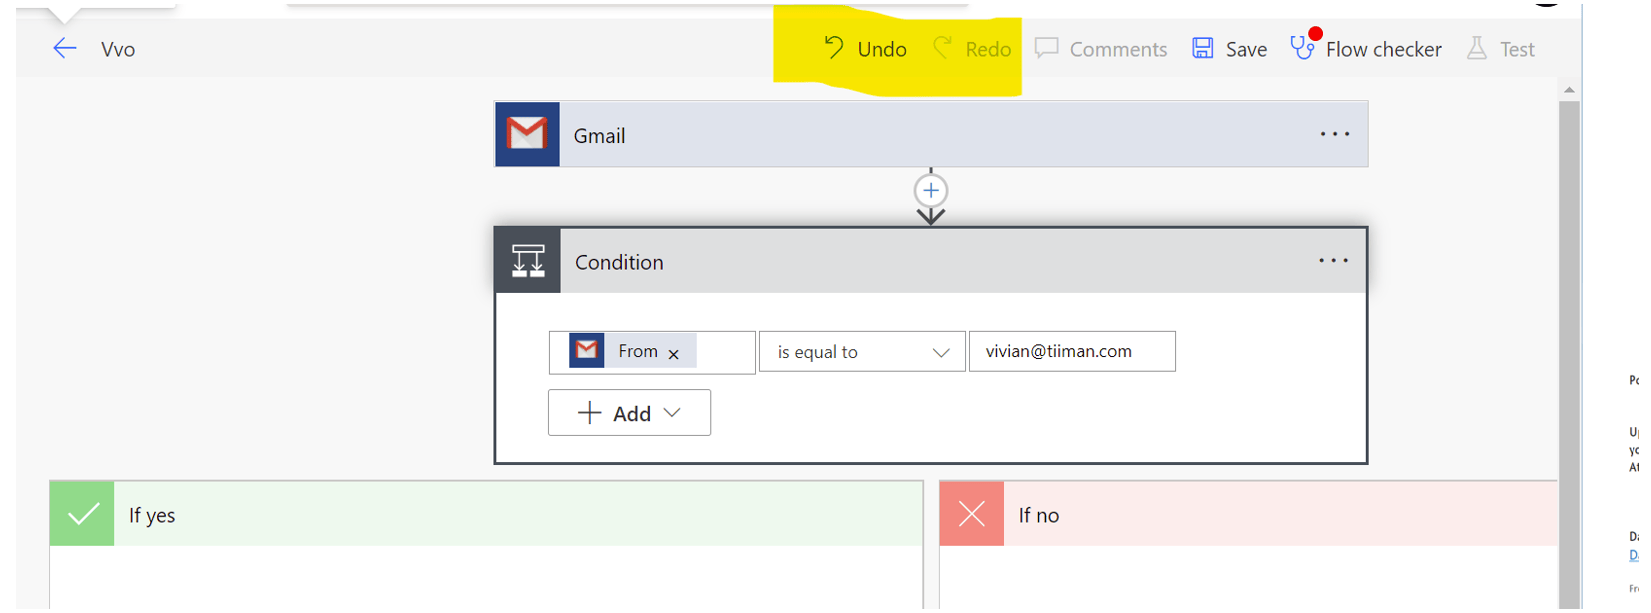
Fig 7: Undo feature in cloud flow designer
Microsoft has improved their Power Automate home page – fig. 8 – to fit the needs for users/makers of any level. The top of the page gives you a selection of templates to choose from to start off with. If you wish to learn more about Power Automate, the next area has learning courses for all levels. These links guide you to Microsoft Learn, where you can complete learning paths and modules for the areas/functionalities, that are most relevant to you.
If training is not something for you, then next section gives you links to most relevant documentation about Power Automate, such as pricing, community forum, documentation and video how-to´s.
If you are curious to see whether or not anything new is happening with Power Automate, then the last part of the home page now shows you “What´s new” posts about updates, training, walk-throughs etc.
So, everything you need to get started or improve your current skills as well as information is available directly from the Power Automate home page.
Read more: Improved home page experience
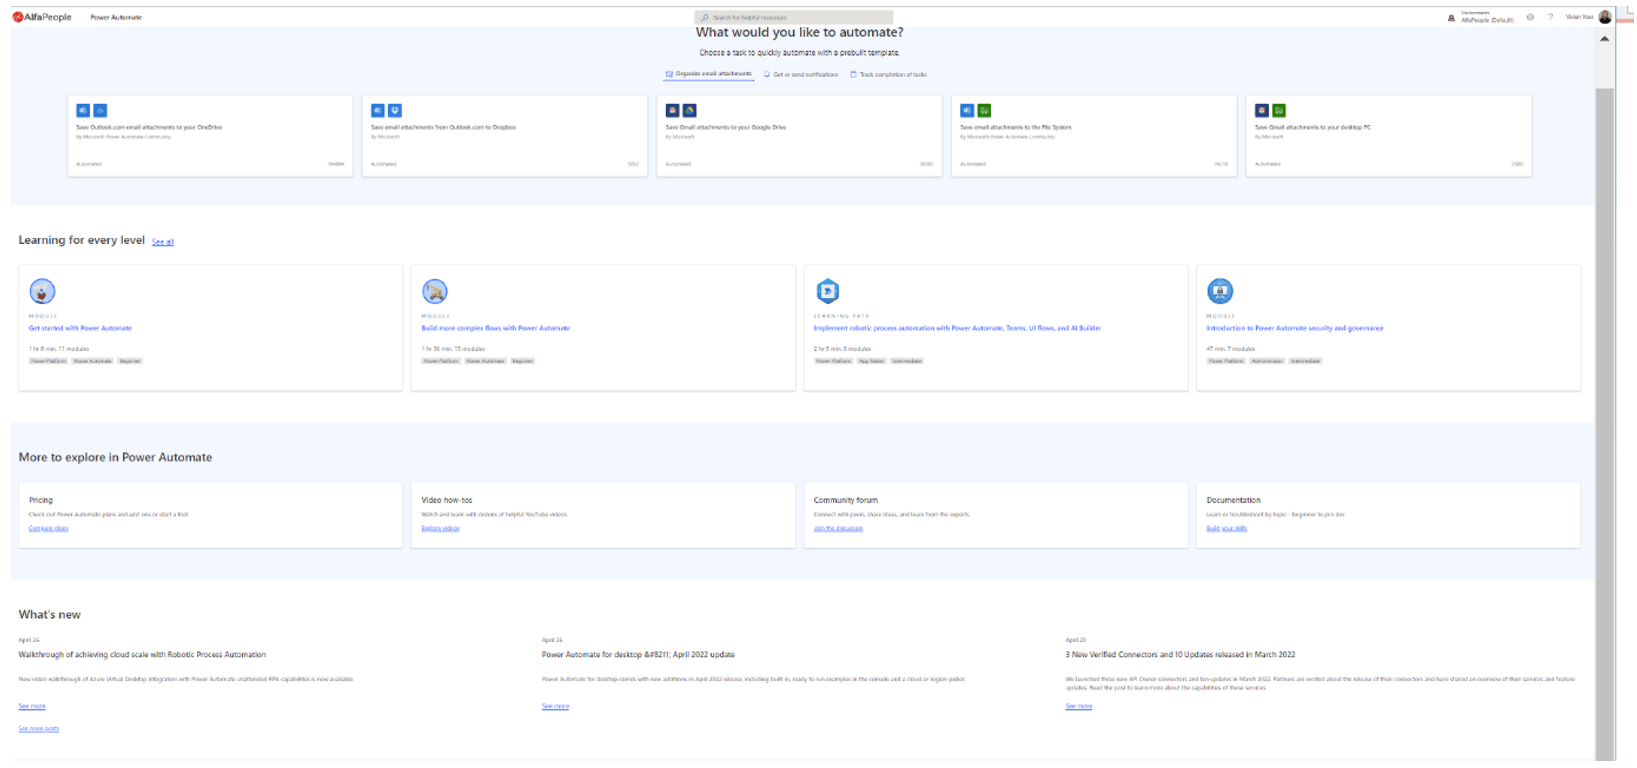
Fig 8: Improved home page experience
Up until now, you have had to submit each failed flow run or test them one by one. That was very frustrating to the maker’s and it took a lot of time. Now, it is possible for makers to re-submit multiple flow runs at once – fig. 9. Just select the runs you want to run again in the Run history section and click “Re-submit” on the top of the page.
Read more: Re-submit multiple failed runs at once

Fig 9: Re-submit multiple failed runs at once


